Regularly cleaning bird feeders is paramount for the health and safety of your backyard birds. Neglecting this simple task can lead to the rapid spread of dangerous pathogens like salmonella and avian pox, turning a helpful feeding station into a hazard. Learn how to clean bird feeders properly with our comprehensive guide, ensuring a safe, hygienic, and inviting environment that keeps your feathered visitors healthy and happy.
How to Clean Bird Feeders?
Isn’t it a joy to watch birds flitting about your garden, visiting your feeders, and filling the air with their cheerful songs? Providing food for our feathered friends is a wonderful way to connect with nature and support local wildlife. However, the simple act of feeding birds comes with a very important responsibility: keeping their dining areas sparkling clean.
Just like we wouldn’t want to eat off dirty plates, birds need a hygienic environment to thrive. An unclean bird feeder, far from being a helpful haven, can quickly become a dangerous hotspot for the spread of diseases. Bacteria, fungi, and viruses can lurk in old seed, damp hulls, and accumulated droppings, turning your good intentions into a health hazard for entire bird populations. But don’t worry, learning how to clean bird feeders effectively is easier than you might think, and it’s a vital step in being a responsible bird host.
This comprehensive guide will walk you through everything you need to know about keeping your bird feeders pristine. We’ll cover why it’s so important, what tools you’ll need, a step-by-step cleaning process, tips for different feeder types, and how often you should be cleaning. By the end, you’ll be a pro at bird feeder hygiene, ensuring your backyard remains a safe and welcoming sanctuary for all your avian visitors. Let’s get those feeders shining!
Key Takeaways
- Health First: Unclean bird feeders are breeding grounds for bacteria, mold, and viruses, which can quickly spread diseases like salmonella and avian pox among bird populations. Regular cleaning protects our feathered friends.
- Gather Your Gear: Before you start, equip yourself with essential tools, including protective gloves, dedicated brushes, buckets, and appropriate sanitizing solutions like a bleach solution or distilled white vinegar.
- Multi-Step Process: Effective cleaning involves more than just a quick rinse. You need to disassemble the feeder, scrub away all debris, soak and sanitize, thoroughly rinse, and most importantly, allow for complete drying before refilling.
- Frequency Matters: The frequency of cleaning depends on the feeder type and weather. Seed feeders generally need cleaning every 1-2 weeks, while nectar feeders require cleaning every 2-3 days, especially in warm weather.
- Tailor to Feeder Type: Different feeders (tube, hopper, platform, suet, nectar) have unique nooks and crannies that require specific attention and cleaning approaches to ensure all parts are thoroughly sanitized.
- Thorough Drying is Crucial: After rinsing, allow feeders to air dry completely. Moisture can promote mold growth, even after sanitation. Using a towel can reintroduce germs, so air drying is best.
- Prevention is Key: Beyond regular cleaning, practices like offering smaller amounts of food, choosing feeder-friendly seed, and proper feeder placement can help minimize contamination and keep feeders cleaner longer.
Quick Answers to Common Questions
How often should I clean my bird feeders?
Seed feeders should be cleaned every 1-2 weeks, while hummingbird/nectar feeders require cleaning every 2-3 days (daily in hot weather) due to rapid mold and bacterial growth in sugar water.
What is the best solution for cleaning bird feeders?
A solution of 1 part unscented household bleach to 9 parts hot water is highly effective. Alternatively, a solution of 1 part distilled white vinegar to 2 parts hot water can be used, though it might be less potent against all pathogens.
Do I need to wear gloves when cleaning bird feeders?
Yes, absolutely! Always wear protective gloves to avoid direct contact with bird droppings and potentially harmful bacteria like Salmonella that can be present on feeders.
Why is thorough drying so important after cleaning?
Thorough drying is crucial because moisture promotes the growth of mold and bacteria, even after sanitation. Allowing feeders to air dry completely prevents new growth and ensures the feeder is safe for birds.
Can I use dish soap to clean bird feeders?
You can use mild, unscented dish soap for initial scrubbing to remove stubborn grime, but always follow with a sanitizing soak (bleach or vinegar solution) and rinse extremely thoroughly to ensure no residue remains, especially for nectar feeders where soap can harm birds.
📑 Table of Contents
Why Cleaning Your Bird Feeder Is Crucial for Bird Health
You might wonder, “Do birds really need us to clean their feeders?” The answer is a resounding yes! While birds are naturally resilient creatures, concentrated feeding spots like your backyard feeders can become disease super-spreaders if not properly maintained. Think of it like a bustling restaurant that never cleans its tables – it wouldn’t be long before germs ran rampant.
Understanding the Risks: Diseases and Pathogens
The primary reason to regularly clean your bird feeders is to prevent the spread of serious bird diseases. Here are some of the most common threats:
- Salmonellosis: This bacterial infection, caused by Salmonella, is one of the most common and deadly diseases transmitted at bird feeders. Symptoms include lethargy, ruffled feathers, weakness, and diarrhea. Infected birds can contaminate seed and water, rapidly spreading the illness to others.
- Avian Pox: This viral disease manifests as warty growths on the featherless areas of birds, particularly around the eyes, beak, and legs. While often not fatal, severe cases can impair vision, eating, or perching, making birds vulnerable. It spreads through direct contact or contaminated surfaces.
- Aspergillosis: A respiratory disease caused by a fungus (Aspergillus) found in moldy seeds or damp environments. Birds inhale the spores, which can lead to lung infections that are often fatal. This is why thorough drying is so important.
- E. coli and Other Bacteria: Bird droppings can contain various bacteria that, when mixed with food and moisture, create a perfect breeding ground for disease.
When birds congregate at feeders, they’re in close contact, increasing the risk of transmission. A single sick bird can quickly infect many others, sometimes leading to local outbreaks that harm entire populations. By learning how to clean bird feeders properly, you actively break this chain of infection.
The Benefits of a Clean Feeder
Beyond preventing disease, a clean feeder offers several advantages:
- Attracts More Birds: Birds are smart! They prefer a clean, safe environment. A sparkling feeder with fresh food is far more appealing than a grimy one.
- Reduces Waste: Old, moldy seed becomes unpalatable and is often left uneaten, leading to waste. A clean feeder encourages consumption of fresh food.
- Better Bird Observation: Healthy, active birds are more enjoyable to watch. A clean feeder gives you peace of mind that you’re truly helping, not harming, your feathered visitors.
Ultimately, keeping your bird feeders clean is a fundamental act of care for the wildlife you invite into your garden. It’s a small effort with a huge positive impact.
What You’ll Need: Your Bird Feeder Cleaning Arsenal
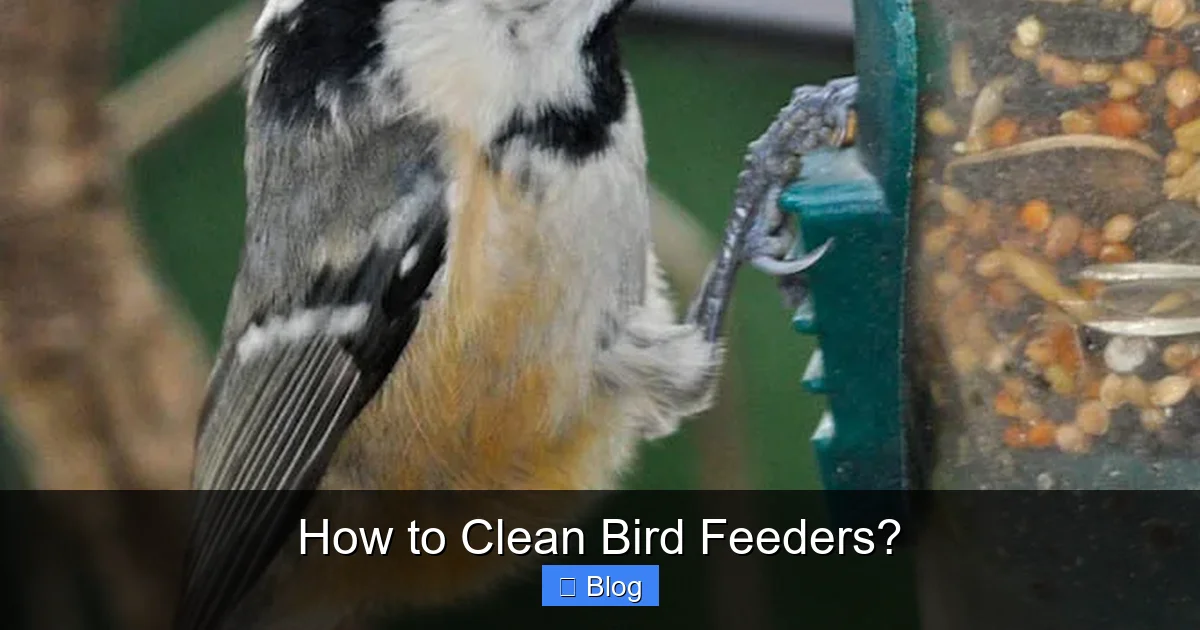
Visual guide about How to Clean Bird Feeders?
Image source: twootz.com
Before you tackle the task of how to clean bird feeders, it’s helpful to gather all your supplies. Having everything at hand makes the process smoother and more efficient. Think of it as preparing for a mini outdoor hygiene operation!
Essential Tools and Supplies
Here’s a list of what you’ll likely need:
- Protective Gloves: Absolutely essential! You’ll be dealing with bird droppings and potentially harmful bacteria. Heavy-duty rubber gloves protect your hands.
- Buckets or Basins: Two are ideal – one for soaking and one for rinsing. Dedicated buckets just for feeder cleaning are a good idea to avoid cross-contamination with household items.
- Stiff Brushes: A variety of brushes will be your best friends.
- Bottle Brush: Perfect for tube feeders and narrow openings.
- Scrub Brush: Good for larger surfaces and platform feeders.
- Small Brushes/Pipe Cleaners: Great for tiny crevices, perches, and hard-to-reach spots.
- Cleaning Solution: You have a couple of effective options:
- Bleach Solution: A mixture of one part bleach to nine parts hot water (e.g., 1/2 cup bleach per gallon of water) is highly effective against bacteria and viruses. Make sure it’s unscented household bleach.
- Distilled White Vinegar: A natural alternative if you prefer to avoid bleach. Use a solution of one part vinegar to two parts hot water. While effective for general cleaning and some bacteria, it might not be as potent against all pathogens as bleach.
- Mild Dish Soap: Can be used for initial scrubbing to remove caked-on grime, but always follow with a sanitizing soak.
- Hose with Strong Spray Nozzle: For initial rinsing and final wash-downs.
- Drying Rack or Clean Towels: For air drying or carefully wiping down feeders. Avoid using cloths that are used for other household tasks.
Safety First!
Always remember these safety tips:
- Work Outdoors: Cleaning bird feeders can be messy and produce aerosols. Work in a well-ventilated outdoor area.
- Protect Yourself: Wear gloves and consider eye protection.
- Dedicated Supplies: Keep your bird feeder cleaning tools separate from kitchen utensils or other household cleaning supplies to prevent cross-contamination.
- Dispose Properly: Don’t dump dirty water near food preparation areas or pet enclosures. Dispose of it down a drain or in an area of your yard where it won’t be easily accessed by humans or animals.
With your arsenal ready and safety in mind, you’re prepared to embark on the step-by-step process of how to clean bird feeders like a pro!
Step-by-Step Guide: How to Clean Bird Feeders Effectively
Now for the practical part: the actual cleaning process. This detailed guide applies to most feeder types and is designed to ensure a thorough, disease-preventing clean. Mastering how to clean bird feeders follows a logical sequence.
Step 1: Preparation and Disassembly
First things first, clear the area. Move your feeders to an outdoor cleaning zone – a patio, driveway, or grassy spot away from pets and children. Then, carefully take your feeder apart. Most modern bird feeders are designed for easy disassembly, allowing you to access all the nooks and crannies. Remove all perches, bases, tops, and individual seed tubes. The more you can take apart, the better you can clean.
Step 2: Emptying and Initial Rinse
Empty all remaining bird seed, husks, and debris into a trash can. Do not scatter it on the ground, as this can attract rodents and spread disease. Once empty, give all parts a good rinse with your garden hose. Use a strong spray nozzle to dislodge loose dirt, droppings, and caked-on grime. This pre-rinse saves you a lot of scrubbing later.
Step 3: The Cleaning Solution – Bleach vs. Vinegar
Now it’s time to sanitize. Prepare your cleaning solution in one of your dedicated buckets:
- Bleach Solution: Mix 1 part unscented household bleach with 9 parts hot water. For example, ½ cup of bleach in 1 gallon of hot water. This creates a 10% bleach solution, which is recommended by many avian experts for its effectiveness against a wide range of pathogens.
- Vinegar Solution: If you prefer a natural alternative, mix 1 part distilled white vinegar with 2 parts hot water. While less potent than bleach for all pathogens, it’s effective for general sanitation and removing mildew.
Submerge all feeder parts completely in the chosen cleaning solution. Let them soak for at least 10 minutes for bleach (no more than 30 minutes to prevent damage) or 30 minutes for vinegar. This soaking time allows the solution to penetrate and kill bacteria and loosen stubborn grime.
Step 4: Scrubbing Away the Grime
After soaking, put on your protective gloves and get scrubbing! Use your various brushes to scrub every surface, inside and out. Pay special attention to:
- Seed Ports: These are notorious for collecting moldy seed and debris.
- Perches: Where birds stand and leave droppings.
- Bottom Trays/Bases: Where husks and droppings accumulate.
- Any crevices or corners: Use smaller brushes or even pipe cleaners for these tight spots.
Ensure you remove all visible traces of dirt, mold, and old food. If using dish soap for extra scrubbing power, make sure it’s a mild, unscented variety, and thoroughly rinse it off before the sanitizing soak (if you didn’t soak already).
Step 5: Thorough Rinsing
This step is critical! After scrubbing and soaking, rinse all feeder parts extremely thoroughly. Use your garden hose with a strong spray, making sure to flush away all traces of the cleaning solution. Residual bleach or vinegar can be harmful to birds. Keep rinsing until you can’t smell any cleaning solution and feel confident that all chemicals are gone. You might even want to let them soak in plain water for a few minutes and then rinse again, just to be extra safe.
Step 6: Drying Is Key
Do not skip this step! Moisture is a breeding ground for mold and bacteria, even after sanitation. After rinsing, place all feeder parts on a clean drying rack or clean towels in a sunny, well-ventilated area. Allow them to air dry completely. This might take several hours, so plan your cleaning on a warm, dry day. Do not use household towels to dry, as they can reintroduce germs. Complete air drying ensures that no damp spots remain to encourage mold or bacterial growth once new food is added.
Step 7: Reassembly and Refilling
Once every single piece is bone dry, carefully reassemble your bird feeder. Now, it’s ready to be refilled with fresh, dry bird seed. Hang it back in its designated spot, and enjoy the sight of healthy, happy birds flocking to their sparkling clean dining establishment!
This systematic approach to how to clean bird feeders ensures you’re providing the safest environment possible for your backyard birds.
Specific Feeder Types: Tailoring Your Approach
While the general steps for how to clean bird feeders apply across the board, different feeder designs require a slightly tailored approach due to their unique shapes and materials.
Tube Feeders
These feeders are popular for dispensing sunflower seeds, safflower, or blends.
- Challenge: Narrow tubes and small seed ports can be hard to reach.
- Tip: Disassemble completely. Use a long, narrow bottle brush to scrub the inside of the tubes. Pay extra attention to the seed ports, often a common spot for mold and mildew buildup, using smaller brushes or even pipe cleaners if necessary. Ensure all parts of the tube are clear of old seed.
Hopper Feeders
Hopper feeders protect large quantities of seed from the elements, but can also harbor moisture and mold if not cleaned properly.
- Challenge: Large capacity means older seed can sit at the bottom, and corners can be missed.
- Tip: Empty all seed, even if it looks fresh. Thoroughly scrub the inside walls and floor of the hopper. Lift the roof and scrub underneath. Pay attention to any sliding panels or dispensing mechanisms that can accumulate debris.
Platform Feeders (Tray Feeders)
These open trays are easy for many bird species to access but are also highly exposed to droppings and weather.
- Challenge: Open design leads to direct exposure to elements and bird droppings.
- Tip: These are generally the easiest to clean. Simply scrape off all dried droppings and old seed. Scrub the entire surface thoroughly with a stiff brush. Ensure drainage holes are clear to prevent water from pooling.
Suet Cages and Nectar Feeders (Hummingbird/Oriole Feeders)
These feeders cater to specific diets and thus have particular cleaning needs.
Suet Cages
- Challenge: Greasy residue from suet can stick to the cage wires, and fragments can get stuck.
- Tip: Discard old suet. Soak the cage in hot, soapy water to help dissolve grease, then scrub thoroughly with a stiff brush to remove all residue and food bits. Sanitize and rinse well.
Nectar Feeders (Hummingbird & Oriole)
These are arguably the most critical feeders to clean frequently due to the rapid growth of mold and bacteria in sugar water, especially in warm weather.
- Challenge: Sugar water is a perfect breeding ground for fermentation, mold, and deadly black yeast. Small feeding ports are hard to clean.
- Tip: These need cleaning every 2-3 days, or even daily in very hot weather. Disassemble completely. Use tiny brushes or cotton swabs for the feeding ports. Avoid soap, as residues can harm hummingbirds; use hot water and a bleach or vinegar solution only. Rinse meticulously.
By adjusting your cleaning strategy for each type of feeder, you ensure that every bird in your garden has a clean and safe place to eat. Knowing how to clean bird feeders for specific designs ensures comprehensive hygiene.
Frequency and Best Practices for Ongoing Maintenance
Understanding how to clean bird feeders is just one part of the equation; knowing how often to clean them and adopting ongoing best practices ensures long-term success in promoting bird health.
How Often Should You Clean Your Feeders?
The frequency of cleaning depends on several factors:
- Seed Feeders (Tube, Hopper, Platform):
- General Rule: Clean every 1-2 weeks.
- Increased Frequency: If you notice a sick bird, a pest infestation, or particularly wet and humid weather, clean immediately and more frequently (e.g., weekly or twice a week).
- Heavy Traffic: If your feeders are constantly busy, daily top-ups might mean daily checks for cleanliness and more frequent full cleanings.
- Suet Cages:
- General Rule: Clean every 2-4 weeks, or more often if suet spoils.
- Warm Weather: Suet can go rancid quickly in warm temperatures; clean weekly or whenever you replace old suet.
- Nectar Feeders (Hummingbird/Oriole):
- General Rule: Clean every 2-3 days.
- Hot Weather: Clean daily, especially if temperatures are consistently above 80°F (27°C). Nectar ferments and grows mold rapidly.
Consistency is more important than sporadic deep cleans. Regular, even quick cleanings, prevent serious buildup.
Preventing Future Buildup and Contamination
Beyond regular cleaning, there are proactive steps you can take to keep your feeders cleaner for longer and minimize disease risk:
- Offer Small Amounts of Food: Instead of filling feeders to the brim, put out smaller quantities of seed more frequently. This ensures the food is always fresh and reduces the chance of it sitting too long and getting moldy or attracting pests.
- Choose the Right Seed: Not all bird seeds are created equal. Black oil sunflower seeds are excellent and produce less waste than striped sunflower seeds. Avoid cheap seed mixes with lots of filler like red milo, which many birds simply kick out, creating ground waste.
- Proper Feeder Placement:
- Away from Dense Cover: Place feeders in an open area, but within sight of protective cover like trees or shrubs. This helps birds spot predators.
- Under Shelter: Consider placing feeders under an overhang or baffle to protect them from rain and snow, which can cause seed to clump and mold.
- Rotate Feeder Locations: Periodically move feeders to prevent a buildup of droppings and seed hulls on the ground below, which can attract rodents and spread disease.
- Clean Up Underneath: Rake up seed hulls and droppings from the ground beneath feeders regularly. This is crucial for preventing mold growth and salmonella spread, especially if feeders cannot be moved.
- Use Ground Feeders Wisely: If using ground feeders, only put out as much seed as birds can eat in a single day. Clean these daily.
- Provide Fresh Water: While not a feeder, a clean bird bath is just as important. Clean and refill bird baths daily with fresh water to prevent algae and bacteria.
Observe Your Birds
Pay attention to the birds visiting your feeders. If you notice any birds exhibiting signs of illness – lethargy, ruffled feathers, difficulty breathing, or growths – take down your feeders immediately. Clean and disinfect them thoroughly, and consider leaving them down for a week or two to encourage birds to disperse and prevent further spread of disease. Report sick birds to local wildlife authorities if possible.
By consistently applying these best practices and knowing how to clean bird feeders with care, you become a truly responsible and beneficial host to your local bird population, contributing positively to their health and well-being.
Conclusion
Congratulations, you’re now equipped with all the knowledge on how to clean bird feeders properly! What might seem like a chore is, in fact, one of the most important aspects of backyard bird feeding. By regularly cleaning and sanitizing your feeders, you are directly contributing to the health and vitality of your feathered friends, protecting them from dangerous diseases that can spread rapidly in unhygienic environments.
Remember, a clean feeder is a healthy feeder. It’s a place where birds can safely gather, find nourishment, and thrive. Make feeder cleaning a regular part of your routine – whether it’s weekly for seed feeders or daily for nectar feeders – and always remember the crucial steps: disassemble, scrub, sanitize, rinse thoroughly, and *always* dry completely. Don’t forget those practical tips for different feeder types and ongoing maintenance to keep your bird haven pristine.
Your efforts won’t go unnoticed. The vibrant activity, the cheerful songs, and the sheer number of healthy birds that frequent your clean feeders will be your reward. So roll up your sleeves, gather your tools, and make your backyard the safest, most welcoming dining spot for every bird that flies by. Happy cleaning, and happy bird watching!
🎥 Related Video: How to clean bird feeders
📺 Eco Sapien
SUBSCRIBE ▻ https://bit.ly/2VCQkOZ Here at Eco Sapien, we’ve shown you how to make loads of different types of bird feeders …
Frequently Asked Questions
What diseases can birds get from dirty feeders?
Birds can contract serious diseases like Salmonellosis, Avian Pox, and Aspergillosis from dirty feeders. These pathogens thrive in environments with old seed, droppings, and moisture, leading to illness or even death in bird populations.
Is it safe to use bleach to clean bird feeders?
Yes, it is safe and highly recommended to use a diluted bleach solution (1 part bleach to 9 parts hot water) for sanitizing bird feeders. The key is to rinse the feeders meticulously afterwards to ensure no bleach residue remains before refilling.
How can I prevent mold from growing in my bird feeders?
To prevent mold, clean feeders regularly, ensure they dry completely before refilling, provide smaller amounts of fresh seed more frequently, and consider placing feeders under an overhang or baffle to protect them from rain.
Should I clean up the area under my bird feeders?
Yes, regularly raking up seed hulls and droppings from the ground beneath your feeders is very important. This prevents the accumulation of mold and bacteria and discourages rodents and other pests from gathering.
Can I clean all my bird feeder cleaning tools in the dishwasher?
It’s generally not recommended to clean bird feeder tools in your household dishwasher, as it can spread pathogens to your regular dishes. It’s best to have dedicated brushes and buckets for bird feeder cleaning and to wash them manually in your outdoor cleaning area.
What should I do if I see a sick bird at my feeder?
If you observe a sick bird (e.g., lethargy, ruffled feathers, unusual growths), immediately take down and thoroughly clean all your feeders. Consider leaving them down for 1-2 weeks to encourage birds to disperse and prevent further disease spread. Contact local wildlife authorities if concerned.