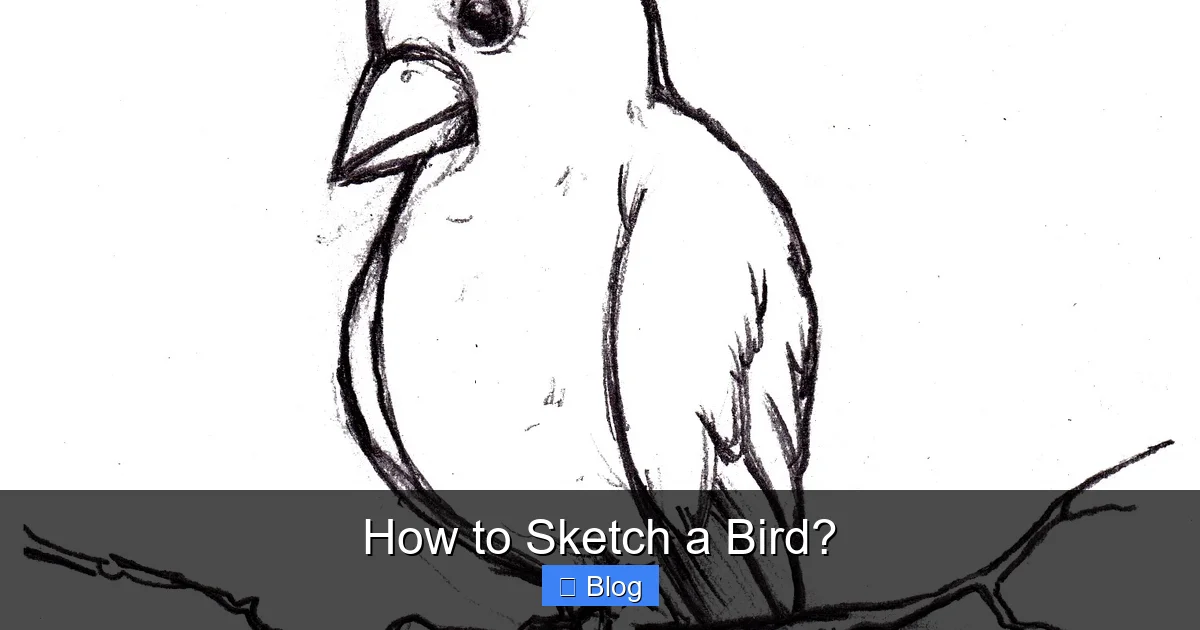
Learning how to sketch a bird can be a delightful and rewarding artistic journey. This comprehensive guide walks you through the entire process, from gathering essential tools and deconstructing complex forms into simple shapes, to understanding basic bird anatomy and adding intricate details like feathers and expressive eyes. You’ll discover practical tips for capturing movement, personality, and bringing your feathered friends to life on paper through observation and consistent practice.
How to Sketch a Bird?
Have you ever found yourself mesmerized by the delicate flutter of a hummingbird, the proud stance of a robin, or the elegant glide of an eagle? Birds are truly magnificent creatures, bursting with life, color, and an incredible array of forms. For artists, they present a wonderful challenge and an endless source of inspiration. If you’ve ever wanted to capture their fleeting beauty on paper but felt intimidated, you’re in the right place!
Learning how to sketch a bird is a rewarding journey that blends observation with artistic skill. It’s not just about drawing; it’s about seeing, understanding, and translating the essence of these fascinating animals. Whether you’re a complete beginner or looking to refine your existing skills, this comprehensive guide will walk you through every step, helping you transform your admiration for birds into beautiful, lively sketches. Get ready to sharpen your pencils and open your eyes to the feathered world around you!
Gather Your Tools: Essential Gear for Bird Sketching
Before you even think about putting pencil to paper, gathering the right tools will set you up for success. You don’t need a fancy art studio; a few simple items can make a world of difference when you want to sketch a bird.
Pencils for Every Purpose
Your primary weapon is, of course, the pencil. A good starting set includes a range of graphite pencils:
- HB: This is your all-around workhorse, perfect for initial light sketches and general lines.
- 2B or 4B: These softer pencils provide darker lines and are excellent for shading, adding depth, and creating rich textures.
- 2H or H: Harder pencils like these are great for very light, barely visible guidelines that you might want to erase later, or for delicate details.
You might also consider a mechanical pencil for fine lines, especially for small details like eyes or tiny feathers. Don’t forget a pencil sharpener to keep your points sharp!
Paper Matters
While any paper will do in a pinch, choosing the right surface can enhance your sketching experience. A smooth or slightly textured drawing paper (80-100 gsm) is ideal. Sketchbooks are fantastic because they keep all your work together and are easy to carry for on-the-go sketching. Look for acid-free paper to ensure your sketches last over time.
Erasers and Other Aids
- Kneaded Eraser: This versatile eraser can be molded into any shape, allowing you to lift graphite gently without damaging the paper. It’s great for lightening areas or creating highlights.
- Vinyl/Plastic Eraser: For more precise or complete erasing, a standard white plastic eraser works wonders.
- Blender/Tortillon: These paper stumps help smooth out graphite, creating seamless shading and soft transitions. You can even use your finger in a pinch, but a tortillon keeps your work cleaner.
Tip: Don’t feel pressured to buy the most expensive art supplies right away. Start with a basic set, and as you sketch a bird more often, you’ll discover what you truly need and prefer.
Deconstruct the Bird: Start with Basic Shapes
The secret to learning how to sketch a bird, or any complex subject, is to break it down into simple, manageable shapes. Forget the intricate feathers for now; think like a sculptor carving out the basic form.
The Head and Body: Circles and Ovals
Most birds can be simplified into two primary shapes: a circle for the head and a larger oval for the body. Start by drawing these two shapes lightly, ensuring they are proportional to each other. The size of the head relative to the body varies greatly between species, so observe your reference carefully.
- For a small bird like a chickadee: The head might be nearly as large as the body.
- For a larger bird like a crow: The head will be significantly smaller in proportion to the robust body.
Adding the Neck and Tail
Once you have the head and body, connect them with a simple curve for the neck. Again, observe how long or short the neck is for your chosen bird. For the tail, extend a triangle or a fan shape from the back of the body oval. This establishes the bird’s overall silhouette.
Positioning the Wings and Legs
Next, lightly sketch the general placement of the wings and legs. Don’t draw individual feathers or toes yet. Think of the wings as elongated ovals or teardrop shapes attached to the upper part of the body. For the legs, use simple lines to indicate their direction and length, making sure they support the bird’s weight naturally.
Tip: Keep your initial lines very light. These are just guide marks. You’ll refine them later, so don’t be afraid to make mistakes and adjust.
Build the Form: Understanding Anatomy and Proportion
With your basic shapes in place, it’s time to give your bird structure. Understanding basic bird anatomy helps immensely when you want to sketch a bird that looks realistic and alive. You don’t need to be an ornithologist, but a general grasp of how their bodies work will make a huge difference.
Core Proportions: Head to Body Ratio
Revisit your initial head and body shapes. Are they accurate for the species you’re drawing? Pay attention to the length of the neck, the slope of the back, and the roundness of the chest. Some birds are plump, others slender. Adjust your ovals and circles to match these subtle differences. This is where your observation skills really come into play.
Wing Structure: The Arm-Hand Analogy
Bird wings, despite their feathery appearance, share a skeletal structure surprisingly similar to a human arm and hand. There’s an “upper arm,” a “forearm,” and a “hand” (the primary flight feathers). Visualizing this underlying structure helps you draw wings that look capable of flight, even when folded.
- Folded Wings: When folded, the wing lies close to the body, typically with the “elbow” joint visible and the primary feathers extending towards the tail.
- Open Wings: For birds in flight, think about the arc and thrust. The wing isn’t flat; it has a subtle curve and distinct joint movements.
Leg and Foot Mechanics
Bird legs vary greatly, from the long, thin legs of a heron to the short, sturdy legs of a sparrow. Notice where the knee joint bends (it’s often higher up and hidden by feathers than you might think) and how the feet grip or stand. Most perching birds have three toes forward and one backward, perfect for wrapping around a branch. Aquatic birds have webbing. Sketch these simple forms before adding scales or claws.
The Beak’s Role
The beak isn’t just a facial feature; it’s a tool. Its shape tells you a lot about the bird’s diet and lifestyle. Is it short and conical for cracking seeds (finch), long and slender for probing nectar (hummingbird), or hooked for tearing meat (raptor)? Draw the beak as a solid, three-dimensional form extending from the head, paying attention to its angle and curve.
Tip: Don’t get bogged down in perfect anatomical accuracy at first. Focus on getting the overall flow and major joint placements correct. Your brain will fill in the rest!
Add the Details: Feathers, Features, and Texture
Now that your bird has a solid foundation, it’s time to bring it to life with details. This is where you transform simple shapes into a recognizable species.
Feather Groups and Flow
Instead of drawing every single feather, think in terms of feather groups or “tracts.” Birds have distinct areas of feathers: head feathers, breast feathers, wing coverts, primaries, secondaries, and tail feathers. Sketch these areas first, observing how they overlap and flow over the body. Use short, directional strokes to suggest the texture and direction of the feathers, rather than drawing hard outlines for each one. Notice how feathers often overlap like shingles on a roof.
- Smooth Areas: For areas like the head and breast, use very light, soft strokes.
- Wing and Tail Feathers: These are more defined. Draw them as slightly overlapping, elongated shapes, paying attention to their individual contours.
Expressive Eyes
The eyes are the windows to the bird’s soul! They are crucial for conveying life and personality. A bird’s eye is typically a perfect circle, often with a darker pupil and a lighter ring around it (the iris). Don’t forget a tiny highlight to make the eye sparkle and appear wet. Position the eye correctly on the head, usually slightly forward and above the beak line.
Beak Textures and Patterns
The beak isn’t always smooth. Many birds have subtle ridges, grooves, or even a cere (a fleshy area at the base of the upper beak, common in parrots and raptors). Observe these details and lightly sketch them. The nostril holes are also important small features to include.
Foot Scales and Claws
For the feet, add texture by lightly sketching small, overlapping scales. Define the individual toes and add pointed claws at the ends. Pay attention to how the claws grip a branch or rest on the ground.
Tip: Use varying pencil pressure to create different textures. Lighter pressure for soft downy feathers, firmer pressure for sharp edges on claws or beaks.
Bring it to Life: Capturing Pose, Movement, and Personality
A static bird sketch can be nice, but a dynamic one truly captivates. Learning how to sketch a bird that looks alive means understanding pose, gesture, and the environment.
Gesture and Flow Lines
When observing birds, they rarely stay still. Practice quick gesture sketches to capture their overall movement and attitude. Use long, flowing lines to suggest the bird’s energy and direction. Is it about to take flight? Is it perching attentively? These quick sketches train your eye to see the “action” of the bird.
Dynamic Poses
Think about the bird’s action. A bird in flight will have outstretched wings, often with a slight curve to create lift. A bird preening will have its head turned at an interesting angle, perhaps with a wing slightly raised. Don’t be afraid to exaggerate a little to convey motion or personality. Pay attention to the direction of light and how it creates shadows and highlights on the bird’s form, which adds to its three-dimensionality and drama.
Environmental Context
A bird rarely exists in a vacuum. Adding a simple branch, a few leaves, or even just hinting at the ground can instantly ground your sketch and tell a story. This also helps with composition and provides a sense of scale. A bird perched on a tiny twig feels different from one on a sturdy branch.
Expressing Personality
Each bird species has a general demeanor, but individual birds can also have unique expressions. Does your bird look curious, alert, relaxed, or even grumpy? Subtle changes in the angle of the head, the tilt of the beak, or the intensity of the eye can convey these feelings. When you sketch a bird, try to imbue it with a little bit of character.
Tip: Use a timer for quick sketches (e.g., 30 seconds to 2 minutes) to force yourself to capture the essence and movement without getting bogged down in details.
Practice Makes Perfect: The Path to Mastery
Like any skill, becoming proficient at bird sketching requires consistent practice and a healthy dose of patience. Don’t expect perfection overnight.
Regular Sketching Habit
The more you sketch, the better you’ll become. Try to set aside a little time each day, even if it’s just 15-20 minutes. Keep a sketchbook handy and grab opportunities to sketch whenever inspiration strikes. Even doodling during a phone call can help keep your hand-eye coordination sharp.
Observe, Observe, Observe
Your eyes are your most valuable tool. Watch birds in your backyard, at a park, or even through documentaries. Pay attention to their forms, how they move, how light catches their feathers, and their unique behaviors. The more you observe, the more your visual library will grow, making it easier to sketch a bird from imagination or memory.
- Use Reference Photos: While live observation is great, birds are fast! High-quality reference photos are invaluable for studying details, feather patterns, and specific poses.
- Visit Zoos or Aviaries: These places offer controlled environments where you can observe a variety of birds up close.
Don’t Be Afraid of “Bad” Sketches
Every artist, no matter how skilled, has sketches that don’t turn out perfectly. These are not failures; they are learning opportunities. Analyze what didn’t work, learn from it, and move on. The goal is progress, not perfection. Embrace the process and celebrate every small improvement.
Seek Feedback and Learn
Share your work with trusted friends, fellow artists, or online communities. Constructive feedback can offer new perspectives and highlight areas for improvement you might not have noticed. Also, look at the work of other bird artists; study their techniques and see how they approach the subject.
Tip: Keep all your sketches, even the ones you don’t love. Looking back at your early work later on is incredibly motivating and shows you how far you’ve come!
Conclusion
Learning how to sketch a bird is a wonderful journey that combines artistic skill with a deeper appreciation for nature. From selecting your basic tools and simplifying complex forms into manageable shapes, to understanding anatomy, adding intricate details, and capturing dynamic movement, each step builds upon the last. Remember, the key ingredients are patience, consistent practice, and keen observation.
Don’t be discouraged by initial challenges. Every line you draw, every bird you attempt to capture, is a step forward in your artistic development. So grab your pencil, find a quiet spot, and let the captivating world of birds inspire your next masterpiece. Happy sketching!
Key Takeaways
- Start Simple: Begin by breaking down a bird’s complex form into basic geometric shapes like circles, ovals, and triangles. This foundational step simplifies the process and helps establish correct proportions before adding detail.
- Understand Anatomy: Familiarize yourself with basic bird anatomy, including the main body mass, head, neck, and the “arm-hand” structure of wings. This understanding is crucial for creating believable and dynamic poses.
- Layer Details Gradually: Don’t try to draw every feather at once. Work in layers, starting with broad feather groups and patterns, then gradually adding finer textures, individual barbs, and highlights to bring out realism.
- Focus on Eyes and Beak: The bird’s eyes are vital for conveying expression and life; make them round, reflective, and positioned correctly. The beak also offers character and helps identify the species, so pay attention to its shape and texture.
- Capture Movement and Gesture: Birds are dynamic creatures. Practice quick gesture sketches to capture their essence, movement, and pose. Use fluid lines to suggest action rather than static outlines.
- Observe Constantly: The best way to improve your bird sketching is through observation. Watch birds in real life, study photographs, and analyze how light falls on their feathers. This deepens your understanding and improves your visual memory.
- Practice Regularly: Consistency is key. Even short, frequent sketching sessions will build your skills faster than occasional long ones. Embrace mistakes as learning opportunities and enjoy the process.
Quick Answers to Common Questions
What are the absolute essential tools to start sketching birds?
You really only need a few things to get started: a couple of graphite pencils (an HB and a softer 2B or 4B), a basic sketchpad, and an eraser (a kneaded eraser is highly recommended).
How do I make my bird sketches look less stiff?
Focus on gesture drawing! Use loose, flowing lines to capture the bird’s overall movement and energy before adding any details. Observe how birds curve and balance, and try to replicate that sense of motion in your initial lines.
Should I draw every feather when I sketch a bird?
No, not necessarily! Instead of individual feathers, think in terms of feather groups and the overall flow of the plumage. Suggest texture with directional strokes, rather than outlining every single barb. This creates a more natural and less laborious look.
What’s the best way to practice drawing bird eyes?
Practice drawing perfect circles. Then, focus on placing the pupil accurately and adding a tiny, bright highlight to make the eye look wet and alive. The placement and shape of the eye are crucial for conveying character.
How important is it to understand bird anatomy?
Understanding basic bird anatomy is very important. It helps you draw believable forms, correctly place wings and legs, and understand how the bird moves. You don’t need to be an expert, but knowing the underlying structure greatly improves realism.
Frequently Asked Questions
What kind of paper is best for sketching birds?
For sketching birds, a smooth or slightly textured drawing paper with a weight of 80-100 gsm is ideal. Sketchbooks are particularly good as they are portable and keep your work organized. Look for acid-free paper to preserve your sketches over time.
How can I find good reference images for bird sketching?
You can find excellent reference images by observing birds in your backyard, visiting local parks or nature reserves, or looking at high-quality photographs online (e.g., bird photography websites, nature magazines). Documentaries can also be a great source for understanding bird behavior and movement.
Is it better to sketch birds from life or from photos?
Both methods offer unique benefits! Sketching from life helps you capture the bird’s energy, movement, and three-dimensional form, though they move quickly. Sketching from photos allows you to study intricate details, feather patterns, and specific poses at your own pace. A combination of both is ideal for well-rounded practice.
How do I add texture to feathers without making them look too busy?
To add texture without busyness, focus on feather groups rather than individual feathers. Use varying pencil pressure and directional strokes to suggest the flow and softness of different feather types. Build up layers of graphite, starting light and gradually adding darker tones for depth and definition.
What are common mistakes beginners make when learning how to sketch a bird?
Common mistakes include starting with too much detail, making birds look stiff and unnatural, drawing flat eyes without highlights, and neglecting basic proportions. Overcoming these involves starting with simple shapes, focusing on gesture, understanding basic anatomy, and paying attention to subtle details like eye highlights.
How long does it take to get good at bird sketching?
The time it takes to get “good” varies for everyone, but consistent practice is the most important factor. With regular, focused practice—even just 15-30 minutes a day—you’ll likely see significant improvement in a few months. Remember, art is a journey, not a race!