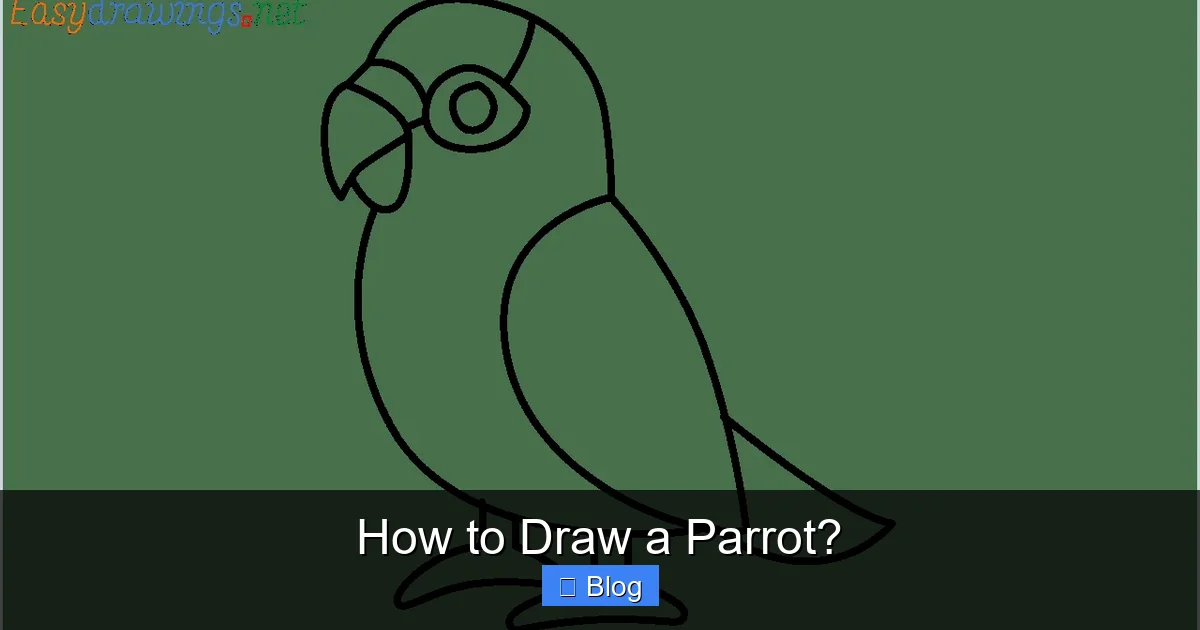
Are you ready to learn how to draw a parrot? This comprehensive guide makes it simple and fun, even for beginners! We’ll break down the process into manageable steps, from sketching basic shapes to adding vibrant colors and intricate feather details, ensuring your parrot drawing looks spectacular. Discover essential tools and techniques to create a beautiful, lifelike parrot.
Welcome, fellow art enthusiasts and bird lovers! Have you ever gazed at a vibrant parrot and wished you could capture its stunning beauty on paper? Well, you’re in for a treat! Drawing these magnificent, colorful creatures can be an incredibly rewarding experience, and it’s perhaps easier than you might think. Whether you’re a complete beginner holding a pencil for the first time or someone looking to refine your bird-drawing skills, this comprehensive guide will walk you through the exciting journey of how to draw a parrot, step by step.
Parrots are truly nature’s masterpieces, boasting an incredible array of colors, from fiery reds and brilliant blues to lush greens and sunny yellows. Their intelligent eyes, distinctive curved beaks, and playful personalities make them fascinating subjects for any artist. Don’t feel intimidated by their complexity; we’re going to break down the process into simple, manageable steps. By the end of this article, you’ll have all the knowledge and tips you need to confidently create your very own feathered friend. So grab your art supplies, settle into a comfortable spot, and let’s embark on this colorful adventure to learn how to draw a parrot!
How to Draw a Parrot: Your Creative Journey Begins!
Learning how to draw a parrot is all about understanding basic shapes, observing details, and having fun with colors. We’ll start with the fundamentals and gradually add complexity, building your skills and confidence along the way. Remember, there’s no single “right” way to draw, so feel free to infuse your unique style into every stroke. Let’s get started on your quest to master how to draw a parrot!
Key Takeaways
- Start with Basic Shapes: Begin your parrot drawing by sketching simple geometric forms like circles, ovals, and cylinders to establish the bird’s body, head, and beak before adding details.
- Understand Parrot Anatomy: Familiarize yourself with key features such as the large, curved beak, expressive eyes, powerful talons, and layered feather patterns to make your drawing realistic.
- Layer Colors for Vibrancy: Parrots are known for their brilliant plumage. Use a layering technique with colored pencils or paints, starting with lighter shades and gradually building up darker tones for depth and richness.
- Focus on Feather Texture: Don’t just color; think about the direction and flow of feathers. Use short, overlapping strokes to create the illusion of soft, ruffled plumage on the wings, tail, and body.
- Add Personality with Eyes and Beak: The eyes are the windows to the soul, even for a parrot! Give your bird character by adding a sparkle in its eye and defining the strong, curved beak with appropriate shading.
- Practice and Experiment: Drawing is a skill that improves with practice. Don’t be afraid to try different parrot species, poses, and color combinations. Every drawing is a learning opportunity!
Quick Answers to Common Questions
What materials do I need to start drawing a parrot?
You’ll primarily need graphite pencils (HB, B, 2B), an eraser, drawing paper, and a coloring medium like colored pencils, markers, or pastels. Reference images are also crucial!
How do I make my parrot drawing look realistic?
Focus on basic anatomy, layering colors for depth, using short, directional strokes for feather texture, and adding highlights and shadows to create a three-dimensional effect. Observing real parrots through reference photos is key.
What’s the easiest way to start sketching a parrot?
Begin by drawing simple geometric shapes: a large oval for the body and a smaller circle for the head. Connect them with curved lines for the neck, then add guides for the beak, wings, and tail.
How do I color a parrot to make it vibrant?
Use a layering technique, starting with light colors and gradually building up darker shades. Blend colors smoothly and use different pressures to create depth and varying feather textures. Don’t be afraid to use many shades of the same color!
What’s a common mistake to avoid when drawing parrots?
A common mistake is drawing flat, two-dimensional shapes. Remember to think about the parrot’s form in three dimensions, using shading and curved lines to suggest its roundness and volume.
📑 Table of Contents
1. Gathering Your Essential Drawing Supplies
Before we dive into the exciting part of sketching and coloring, let’s make sure you have everything you need. Having the right tools can make a big difference in your drawing experience and the final outcome. Don’t worry, you don’t need a professional art studio; a few basic items will suffice to learn how to draw a parrot.
Essential Supplies for Your Parrot Drawing
- Graphite Pencils: A range of pencils from hard (H or 2H) for light sketches to soft (B, 2B, or 4B) for darker lines and shading is ideal. If you only have one, an HB pencil is a great all-rounder.
- Eraser: A good quality kneaded eraser or a soft vinyl eraser is crucial for lifting mistakes without smudging or damaging your paper.
- Drawing Paper: Any smooth, sturdy paper will do to start. If you plan to use markers or watercolors, opt for thicker paper (e.g., Bristol paper or watercolor paper) to prevent bleed-through or buckling.
- Colored Pencils, Markers, or Pastels: This is where your parrot will truly come to life! Choose your preferred coloring medium. Colored pencils are excellent for layering and detail, while markers offer bold, vibrant colors, and pastels provide soft, blendable effects.
- Reference Images: Find some clear photos of parrots! Observing real parrots will help you understand their anatomy, feather patterns, and vibrant colors. Look for different angles and species.
Optional Extras to Enhance Your Work
- Pencil Sharpener: Keep your pencils sharp for precise lines and details.
- Blending Stump or Tortillon: Useful for smoothly blending graphite or colored pencil lines.
- Ruler: Handy for drawing straight lines if you’re including a perch or cage, though freehand is often better for organic forms.
- Fine-Tip Pen (for inking): If you want crisp outlines, an archival fine-tip pen can be used after sketching.
Having your tools ready sets the stage for a smooth and enjoyable drawing session. Now, let’s move on to understanding the parrot’s basic structure, which is key to knowing how to draw a parrot accurately.
2. Understanding Parrot Anatomy: Breaking Down the Bird
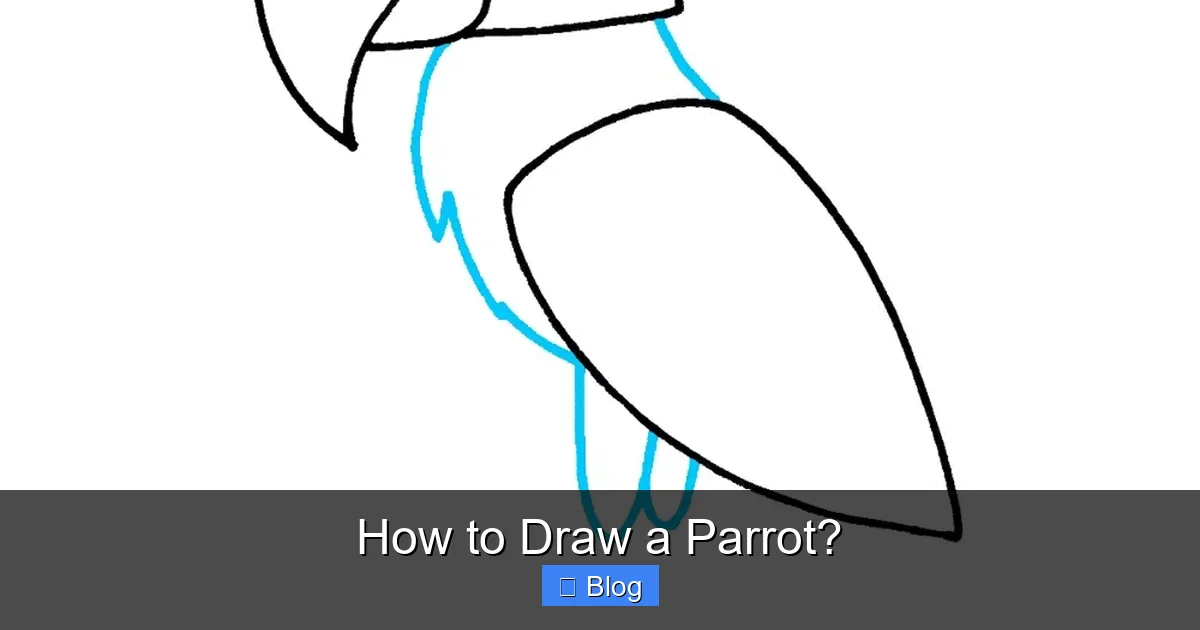
Visual guide about How to Draw a Parrot?
Image source: howtodraweasy.net
Before you put pencil to paper for your final drawing, it’s incredibly helpful to understand the basic anatomy of a parrot. Think of it like building blocks; once you get the fundamental shapes right, adding details becomes much easier. This step is crucial for anyone learning how to draw a parrot realistically.
The Core Shapes: Body and Head
Every drawing starts with simple shapes. For a parrot, you’ll typically begin with two main ovals or circles:
- Body: Sketch a large oval for the main body. This will be the biggest part of your parrot. Think of it as the core.
- Head: Draw a slightly smaller circle or oval on top of and overlapping the body oval. This will form the head. Don’t worry about perfection; these are just guides.
- Connecting Neck: Gently connect the head to the body with two curved lines, forming the neck. This helps to make the transition smooth.
Head and Beak Details
The head of a parrot is full of character.
- Eyes: Place the eye within the head circle. Parrot eyes are usually round and positioned on the sides of their heads, giving them a wide field of vision. A small dot for the pupil and a larger circle for the iris will do.
- Beak: This is one of the most distinctive features when you learn how to draw a parrot! Draw a large, curved, hook-like beak. It typically comes in two parts: an upper mandible that curves down and an often shorter, more rounded lower mandible. The nostrils (nares) are usually located at the base of the upper beak.
Wings and Tail Feathers
These parts add dynamism and flair to your parrot drawing.
- Wings: From the top of the body oval, extending downwards, sketch a curved shape for the folded wing. Think of it as a long, slightly bent teardrop shape. If your parrot is in flight, the wings will be fully extended and more complex. For a perched parrot, a single, clear wing outline is usually enough.
- Tail: Parrots often have long, prominent tail feathers. Extend a group of long, tapering lines from the bottom of the body oval. The length and shape can vary greatly by species, so refer to your reference photo.
Legs and Talons
Parrot legs are strong and built for gripping.
- Legs: Sketch two short, thick lines extending from the bottom of the body where the legs would attach. They often appear to be holding onto something.
- Talons: Parrots have zygodactyl feet, meaning two toes point forward and two point backward. This helps them grip branches and manipulate food. Draw small, curved lines for the toes, ensuring they look like they’re wrapping around an imaginary perch.
Understanding these foundational shapes and features will make the actual drawing process much smoother. Now that we’ve broken down the parrot, let’s learn how to draw a parrot step-by-step!
3. Step-by-Step Drawing Process: From Sketch to Outline
Now that you’re familiar with the basic anatomy and have your supplies ready, let’s begin the exciting journey of actually drawing your parrot! This step-by-step approach will guide you through creating a solid foundation for your masterpiece. This is the core of how to draw a parrot effectively.
Step 1: Sketching the Foundation
Start with a very light hand, using your HB or H pencil. These initial lines are just guides and will be erased later.
- Body and Head: Draw a large oval for the body. Overlap a smaller circle for the head where you want your parrot’s head to be.
- Neck: Connect the head and body with two gentle, curved lines to form the neck.
- Guide for Beak: Draw a light, slightly angled line extending from the front of the head to guide the placement and angle of the beak.
- Wing and Tail Guides: Sketch a curved “teardrop” shape for the wing on the side of the body. Add long, tapering lines extending from the bottom of the body for the tail.
Step 2: Refining the Outline
Now, it’s time to refine those basic shapes into a more recognizable parrot form.
- Head Shape: Gently refine the head circle to give it a more natural, rounded parrot head shape, perhaps slightly flattening the top or curving the back of the skull.
- Beak Definition: Using your guide line, draw the distinct curved upper and lower mandibles of the beak. Remember the hook shape.
- Eye Placement: Lightly sketch a circle for the eye, making sure it’s proportional to the head and positioned correctly based on your reference.
- Body Contour: Refine the body oval, giving it a more organic, slightly rounded shape that flows into the neck and tail base.
- Wing Outline: Refine the wing shape, adding a slight curve to its edges, hinting at the way feathers layer.
- Tail Feather Guides: If desired, you can lightly sketch out individual feather shapes within the tail guide, keeping them long and overlapping.
Step 3: Adding Facial Features and Details
This is where your parrot starts to gain personality! Use a slightly darker pencil (like an HB or B).
- Eye Details: Draw a darker circle for the pupil within the eye and perhaps a smaller, even darker dot for a highlight, giving the eye a reflective quality and life. Add a small ring around the pupil for the iris.
- Nostrils: Lightly mark the small nostrils (nares) at the base of the upper beak.
- Beak Definition: Darken the beak outline and add a subtle line where the two mandibles meet. You can also add some texture lines on the beak.
- Refine Head Contours: Add subtle lines around the eye or cheek area to suggest feather patterns or facial structure.
Step 4: Detailing Feathers and Form
This step focuses on giving your parrot its feathery appearance.
- Feather Direction: Think about how feathers lie on a bird. Use short, overlapping, curved strokes to suggest the layers of feathers on the head, neck, body, and wings. Don’t draw every single feather; suggest the texture.
- Wing Feathers: For the wing, draw distinct, elongated feather shapes. These primary and secondary flight feathers are often longer and more defined.
- Tail Feathers: Draw the individual tail feathers, ensuring they taper nicely and overlap.
- Subtle Shading: Use very light shading with your pencil to hint at the roundness of the body and the form of the wings. Areas under the wing or on the underside of the body would be slightly darker.
Step 5: Drawing the Legs and Perch
Almost done with the outline!
- Legs: Draw the sturdy legs extending from the lower part of the body.
- Talons/Feet: Draw the zygodactyl feet, making sure the toes look like they are gripping a perch. Two toes forward, two toes back. Add small, sharp curves for the claws.
- Perch (Optional): If you want your parrot to be perched, draw a branch or a simple wooden dowel for it to grip. Make sure the branch looks like it’s *behind* the parrot’s feet.
Step 6: Cleaning Up Your Sketch
- Erase Guide Lines: Carefully use your kneaded eraser to lighten or completely remove any initial sketch lines that are still visible and no longer needed.
- Darken Key Lines: Once you’re happy with the overall form, go over the final outlines with a slightly darker pencil (like a B or 2B) to make them stand out.
Phew! You’ve successfully outlined your parrot. This foundation is solid. Now for the most exciting part: bringing it to life with color! This part truly showcases how to draw a parrot in all its glory.
4. Bringing Your Parrot to Life: Color and Texture
This is where the magic happens! Parrots are renowned for their brilliant plumage, and adding color is often the most enjoyable part of the process. This section will guide you through transforming your outline into a vibrant, realistic parrot.
Choosing Your Colors and Medium
Before you start, decide on your coloring medium and gather your colors.
- Reference Photo: Keep your reference photo handy. Pay close attention to the specific hues and patterns of the parrot you’re drawing.
- Color Palette: Select a range of colors that match your parrot, including primary colors, secondary colors, and subtle shades for shadows and highlights. Don’t forget browns, grays, or black for the beak and feet.
- Medium Choice: If using colored pencils, ensure they’re sharp. If using markers, have a good selection of shades. If using pastels or paints, prepare your palette.
Layering and Blending for Depth
The key to vibrant, lifelike color is layering.
- Start Light: Begin with the lightest shade of each color. For example, if your parrot is green, start with a pale lime green. Apply the color lightly and evenly over the appropriate areas.
- Build Up Color: Gradually add darker shades of the same color, layering them over the initial light layer. For a green parrot, you might add a mid-tone green, then an emerald green, and finally a dark forest green in shadowed areas. This creates depth and richness.
- Blending: If using colored pencils, you can blend colors by applying firm pressure or using a blending stump. For paints, blend while wet. For markers, use blending techniques specific to the brand.
- Color Transitions: Pay attention to how colors transition on your parrot. There might be a sharp line between green and red, or a soft blend from blue to yellow.
Creating Feather Texture
Don’t just color flatly; think about the direction and texture of the feathers. This is a vital step in learning how to draw a parrot that looks real.
- Short Strokes: On the body and head, use short, overlapping strokes in the direction of feather growth. This creates the illusion of soft, downy feathers.
- Longer Strokes for Flight Feathers: For the primary and secondary flight feathers on the wings and tail, use longer, more defined strokes to mimic their distinct shape and structure.
- Vary Pressure: Vary the pressure on your coloring tool. Lighter pressure for soft, fuzzy areas and firmer pressure for areas with more defined feathers.
- “Fuzzy” Edges: Don’t always draw perfectly crisp outlines. Sometimes, a slightly “fuzzy” edge where feathers meet the air can enhance realism.
Adding Highlights and Shadows for Form
Highlights and shadows are what give your drawing a three-dimensional look.
- Shadows: Observe where light hits your parrot in your reference photo. Areas that are turned away from the light source or are underneath other body parts (like under the wing, under the chin, or on the underside of the belly) will be darker. Use darker shades of your base colors or even a touch of gray, brown, or a complementary color to create shadows.
- Highlights: Highlights are the brightest spots where light directly hits the parrot. Leave these areas slightly lighter or use a very pale color, even white, to suggest shine, especially on smooth feathers, the beak, or the eye. A small white dot in the eye can bring it to life!
- Beak and Talons: Use grays, browns, or blacks with appropriate highlights and shadows to give the beak and talons a hard, strong appearance.
Take your time with the coloring process. Layering and blending take patience, but the results are incredibly rewarding. Your parrot is now bursting with color and life! This detailed approach will definitely help you in how to draw a parrot that truly stands out.
5. Advanced Techniques and Tips for Parrot Drawing
You’ve learned the fundamentals of how to draw a parrot. Now, let’s explore some advanced tips and techniques to elevate your artwork and truly capture the essence of these magnificent birds.
Capturing Personality and Expression
Parrots are known for their lively personalities. You can hint at this in your drawing:
- Expressive Eyes: The eyes are key. A bright highlight can suggest alertness. The shape of the eyelid can convey emotion. A slightly furrowed “brow” (feather arrangement) might suggest curiosity.
- Head Tilt: A subtle tilt of the head can make a parrot look curious or engaged.
- Body Language: Consider the parrot’s posture. Is it perky and alert, or relaxed and preening?
Exploring Different Parrot Species
The world of parrots is vast! Once you’re comfortable with the basics, challenge yourself to draw different species.
- Macaws: Known for their large size, long tails, and striking facial patterns (bare skin around the eyes).
- Cockatiels: Smaller, with crests, orange cheek patches, and more muted colors.
- African Greys: Famous for their intelligence, often depicted with gray bodies and a bright red tail.
- Cockatoos: Distinguished by their prominent, movable crests and mostly white or pink plumage.
Each species offers unique anatomical features and color palettes to explore, expanding your skills in how to draw a parrot in various forms.
Adding Backgrounds and Environments
Placing your parrot in an environment can tell a story and add depth to your drawing.
- Simple Perch: A natural branch or a textured wooden perch is a classic choice. Add moss, leaves, or bark texture.
- Tropical Foliage: Suggest lush leaves, exotic flowers, or distant jungle trees. Keep the background less detailed than the parrot so the bird remains the focal point.
- Blurry Backgrounds: For a photographic effect, draw the background elements slightly out of focus, allowing your sharp-focused parrot to pop.
Practice Makes Perfect and Observing Nature
Drawing is a journey, not a destination.
- Draw Regularly: The more you draw, the more your hand-eye coordination and observational skills will improve.
- Observe Real Birds: Spend time watching birds, even common ones. Notice how light hits their feathers, how they move, and their unique characteristics. This direct observation is invaluable for how to draw a parrot with realism.
- Don’t Be Afraid to Experiment: Try different angles, poses, and emotions. Use various art mediums. Push your boundaries!
Remember, every drawing is a step forward. Embrace the process, learn from each attempt, and most importantly, have fun creating your art. You are now well-equipped to master how to draw a parrot!
Conclusion: Your Beautiful Parrot Awaits
Congratulations! You’ve navigated the intricate yet enjoyable process of how to draw a parrot, from the initial sketch to adding vibrant colors and intricate details. We’ve covered everything from gathering your tools and understanding basic anatomy to layering colors and applying advanced techniques. You’ve learned how to break down a complex subject into simple, manageable steps, building confidence with every stroke of your pencil or brush.
The journey of learning how to draw a parrot is a testament to patience, observation, and a willingness to explore. Don’t be discouraged by initial imperfections; every artist starts somewhere. Keep practicing, keep experimenting, and keep observing the natural world around you. Each parrot you draw will be a little better than the last, reflecting your growing skill and unique artistic voice. So, go forth and fill your world with colorful, feathered friends. Happy drawing!
Frequently Asked Questions
How do I choose the right colors for my parrot?
Always use a reference photo of the specific parrot species you’re drawing. Pay close attention to the exact hues, how they transition, and where highlights and shadows naturally fall. Don’t just pick generic “parrot colors”; observe the real thing.
Should I draw every single feather?
No, usually not. Drawing every feather can make your parrot look stiff or overly busy. Instead, focus on suggesting the texture and direction of feathers using groups of short, overlapping strokes, especially on the body. Reserve more defined feather shapes for the flight feathers on the wings and tail.
What if my parrot drawing looks asymmetrical?
Don’t worry, perfect symmetry is rare in nature and often looks unnatural in art. Use your initial light sketches as guides and constantly compare both sides as you refine. Slight imperfections can add character to your parrot.
How can I make the parrot’s eye look more alive?
The key to a lively eye is contrast and a highlight. Draw a dark pupil, then a lighter iris, and add a small, distinct white dot or crescent for a reflection (highlight). This gives the eye depth and a sparkling, intelligent look.
What’s the best way to draw the curved beak of a parrot?
Start with a strong, curved line for the top of the upper mandible, mimicking its hook shape. Then, draw a shorter, often thicker line for the lower mandible. Pay attention to where the two parts meet and add subtle shading to give it a hard, rounded form.
How can I improve my parrot drawings over time?
Consistent practice is paramount. Additionally, study real parrots from various angles, experiment with different art mediums and styles, and don’t be afraid to try new techniques. Review your old drawings to see your progress and identify areas for improvement.