Embark on a delightful artistic journey to learn how to draw a dove, a timeless symbol of peace and purity. This comprehensive guide makes the process accessible for artists of all levels, breaking down complex forms into simple, manageable steps. You’ll discover how to sketch basic shapes, refine details, and add the finishing touches to bring your serene feathered friend to life on paper.
How to Draw a Dove?
Have you ever looked at a beautiful dove, perhaps perched gently on a branch or soaring gracefully through the sky, and wished you could capture that serene beauty on paper? Doves, with their elegant forms and symbolic representation of peace and love, are truly inspiring subjects for any artist. But perhaps you’ve thought, “I could never draw something so intricate!” Well, I’m here to tell you that you absolutely can, and it’s much simpler than you might imagine.
Drawing is a skill that anyone can learn, and it’s all about breaking down complex subjects into simple, manageable steps. You don’t need to be a seasoned professional to create a lovely image of a dove. All it takes is a pencil, some paper, a little bit of patience, and a willingness to try. This guide is designed to walk you through the entire process, from the very first lines to the final delicate touches, making “how to draw a dove” an enjoyable and rewarding experience.
So, grab your art supplies, settle into a comfortable spot, and let’s embark on this creative journey together. We’ll start with the foundational shapes, gradually build the anatomy, add intricate details, and even touch on shading to give your dove a lifelike quality. By the end of this article, you’ll not only have a beautiful drawing but also a newfound confidence in your artistic abilities. Ready to create some magic? Let’s dive in!
Key Takeaways
- Start Simple: Begin by sketching basic geometric shapes like circles and ovals to establish the dove’s head and body, ensuring correct proportions from the outset.
- Utilize Reference Images: Always use clear photographic references of doves to understand their anatomy, feather patterns, and natural poses for a more accurate and lifelike drawing.
- Build in Layers: Progress from light, loose construction lines to more defined outlines, gradually adding details like wings, tail, eyes, and beak, allowing for easy corrections.
- Master Feather Texture: Learn techniques for suggesting soft feathering rather than drawing every single feather, focusing on direction and overlapping patterns.
- Add Depth with Shading: Understand basic light and shadow principles to give your dove form and dimension, making it appear three-dimensional on the page.
- Practice and Patience: Drawing is a skill that improves with consistent practice; don’t be afraid to make mistakes and view each attempt as a learning opportunity.
Quick Answers to Common Questions
What kind of pencil is best for sketching a dove?
An HB pencil is ideal for initial sketches because it creates light lines that are easy to erase. You can use softer pencils (like 2B or 4B) for darker lines and shading later.
Do I need to draw every single feather?
No, definitely not! Focus on suggesting the texture and direction of the feathers using short, overlapping strokes rather than drawing each individual feather. This creates a more natural look.
How do I make the dove look three-dimensional?
Adding subtle shading is key. Identify a light source and apply darker tones in areas that would be in shadow, gradually lightening the tones towards areas hit by the light. This gives your dove volume and depth.
What’s the most important part to get right when drawing a dove?
Getting the basic proportions and overall shape correct in the initial stages is most crucial. If the head is too big or the wings are too small, no amount of detail will fix it later.
Can I draw a dove even if I’m a beginner?
Absolutely! This guide is designed for beginners. By breaking the process into simple steps, anyone can learn how to draw a dove. Patience and practice are your best tools.
📑 Table of Contents
Gathering Your Tools & Mindset
Before we even put pencil to paper, let’s make sure you have everything you need and are in the right frame of mind. The good news is, you don’t need fancy, expensive equipment to learn how to draw a dove effectively. Basic supplies are perfectly fine to start your journey.
Essential Supplies for Drawing Doves
To begin, here’s a short list of what you’ll find most useful:
- Pencils: A few different graphite pencils are ideal. An HB pencil is great for initial sketches and general drawing. A 2B or 4B can be used for darker lines and shading. If you only have one, an HB will do.
- Paper: Any standard drawing paper, sketchpad paper, or even plain printer paper will work. Just make sure it’s not too thin, as you’ll be erasing a bit.
- Eraser: A good quality kneaded eraser or a white plastic eraser is invaluable. Kneaded erasers are great because they don’t leave crumbs and can be molded to pick up light marks.
- Reference Images: This is arguably one of the most important “tools.” Find a few clear photographs of doves in various poses. Look for pictures that show the dove from different angles – standing, flying, or even just its head and shoulders.
- Sharpener: Keep your pencils sharp for precision!
The Power of Reference Photos
You might be tempted to draw a dove entirely from memory, but for accurate and lifelike results, reference photos are your best friend. A good reference image helps you understand:
- Proportions: How big is the head compared to the body? How long are the wings and tail?
- Anatomy: Where do the wings attach? What does the beak look like from the side? How do the legs bend?
- Feather Patterns: How do the feathers overlap? What direction do they flow?
- Lighting and Shadow: Where does the light hit the dove, and where do the shadows fall?
Don’t just pick one photo. Look at several to get a general idea of dove characteristics. This helps you create a composite image in your mind, preventing your drawing from looking exactly like one specific photo, but rather like a “typical” dove.
Embrace the Process, Not Just the Perfection
Drawing can be incredibly relaxing, but it can also be frustrating if you aim for perfection on your first try. Remember, this is a learning process. Your first attempt at how to draw a dove might not be exactly what you envisioned, and that’s perfectly okay! Every line you draw, every mistake you erase, is a step towards improvement. Be patient with yourself, enjoy the journey, and don’t be afraid to experiment.
Deconstructing the Dove: Basic Shapes & Proportions
The secret to drawing anything complex is to simplify it first. A dove, with all its beautiful feathers and graceful curves, is fundamentally built from very basic shapes. This is where we lay the foundation, so use light, sketchy lines that are easy to erase.
The Core Structure: Head and Body
Let’s start with the two main components of our dove:
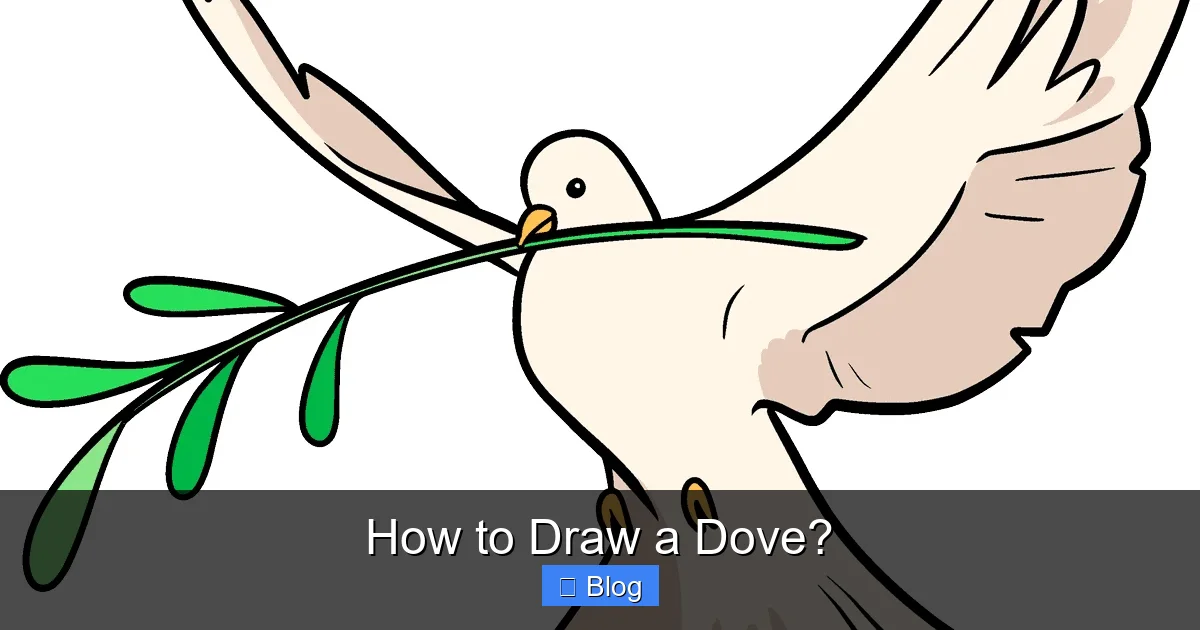
Visual guide about How to Draw a Dove?
Image source: artforkidshub.com
- The Body: Begin by drawing a large, slightly elongated oval in the center of your paper. This will be the main mass of the dove’s body. Think of it like a plump potato or a smooth egg. Don’t press too hard with your pencil; these are just guide marks.
- The Head: Above and slightly to the front of the body oval, draw a smaller circle for the head. The size relationship is crucial here – the head should be significantly smaller than the body. Often, a dove’s head is about 1/4 to 1/5 the size of its body in terms of width. Make sure there’s enough space between the head and body for a short neck.
At this stage, you’re not drawing a dove; you’re just laying down the blueprint. Think of it as constructing a simple snowman.
Adding the Tail and Wings (Initial Placement)
Now, let’s roughly place the other major elements:
- The Tail: Extend an angled shape from the back of the body oval. Doves typically have fairly short, fan-like tails. It could be a slightly rounded triangle or a gentle fan shape. The length will depend on whether your dove is perched or in flight, but generally, it won’t be overly long.
- The Wings: For a perched dove, the wings will fold neatly along the back. Draw two curved lines extending from the top-back of the body oval, tapering towards the tail. If your dove is in flight, you’ll need to sketch two large, graceful arcs on either side of the body. We’ll refine these much more later, but for now, just establish their general direction and length.
These initial shapes are your scaffolding. They help you get the overall proportions right before you get bogged down in details. If something looks off, erase it and redraw it lightly until it feels right. This is the beauty of starting with light lines!
Guiding Lines for Balance and Axis
To ensure your dove looks balanced and natural, consider adding a few central axis lines. For example, draw a light curved line through the center of the body oval to indicate its general direction. You might also draw a vertical line through the head circle to help with eye and beak placement later. These lines are like the grid lines on a map, helping you navigate the form.
Building the Form: Refining Anatomy and Flow
Once your basic shapes are in place, it’s time to connect them and start giving your drawing a more organic, dove-like appearance. This is where you begin to “sculpt” your dove out of those geometric forms.
Connecting the Dots: Neck and Torso
Doves have smooth, elegant curves. Use your pencil to gently connect the head circle to the body oval. The neck should be relatively short and graceful, creating a gentle curve rather than a stiff straight line. Think about the flow of the bird’s body. The chest area will be fuller, curving smoothly from the neck into the main body oval. The back will also have a gentle, continuous curve down towards the tail.
As you draw these connecting lines, look at your reference photos. Notice how the feathers smooth out the transition between different body parts. Don’t make the neck too thin or too thick; doves have a delicate balance.
Understanding Wing Anatomy and Placement
The wings are key to conveying the dove’s character. Whether perched or flying, they need to look convincing. For a perched dove:
- Shoulder Area: The wings attach high on the back. Gently round off the top of the body where the wings begin, creating a shoulder area.
- Folding Wings: Draw two elongated, slightly curved shapes that follow the curve of the body towards the tail. The top wing will slightly overlap the bottom one. Notice how the primary feathers (the long flight feathers) are visible at the very end of the folded wing, often creating a neat, layered edge.
For a flying dove, the wings become much more dynamic:
- Broad Arcs: Expand your initial wing guides into broader, more defined arcs.
- Feather Sections: A bird’s wing isn’t a single flat paddle. It has distinct sections: the upper wing, the mid-wing, and the primary flight feathers. Observe your reference to see how these parts move and overlap, creating a strong, yet flexible, structure.
- Leading Edge: The front edge of the wing should be thicker and stronger, while the trailing edge, where the primary feathers fan out, will be lighter and more flexible.
Pay close attention to how the wings flow naturally from the body. Stiff, unnatural wings are a common pitfall when learning how to draw a dove.
Legs and Feet Made Simple
Doves have relatively short, slender legs and small feet. For a perched dove:
- Leg Placement: Draw two simple, thin lines extending from the bottom of the body. They typically emerge from the lower middle part of the body.
- Joints: Notice the “knee” joint (which is actually more like an ankle joint, as birds walk on their toes). It bends backward.
- Toes: Doves usually have three toes pointing forward and one pointing backward, perfect for gripping branches. Keep the toes simple and slightly curved. If your dove is on the ground, the toes might splay out a bit.
Don’t overcomplicate the legs and feet. For many poses, they are partially obscured by feathers, so you only need to suggest their form rather than render them in hyper-detail.
Bringing it to Life: Feathers, Features, and Expression
Now that the basic anatomy is solid, we can start adding the details that truly make your drawing recognizable as a dove. This is where the magic happens, transforming simple lines into a living creature.
The Eye: Soul of the Dove
The eye is arguably the most expressive feature of any animal, and a dove is no exception. Its gaze can convey peace, curiosity, or alertness.
- Placement: The eye is typically located on the side of the head, slightly above the center line. In a profile view, it will be clearly visible.
- Shape: Doves have round, dark eyes. Draw a small, perfect circle.
- Pupil and Iris: Fill the circle almost entirely with a dark pupil, leaving a tiny highlight (a small, uncolored spot) to give it a reflective, wet look. This highlight is crucial for bringing the eye to life. The iris is usually a very thin ring around the pupil, often a subtle red or orange color, which you can hint at with a slightly lighter shade if you plan to add color.
- Eye Ring: Many doves have a distinct, often lighter-colored or reddish ring around their eye. Suggest this with a thin line.
A well-drawn eye can instantly elevate your “how to draw a dove” sketch.
Crafting the Beak and Nostrils
The dove’s beak is relatively small and delicate.
- Shape: Draw a short, pointed cone shape extending from the front of the head, just below the eye. The upper mandible (top part) usually curves slightly over the lower one.
- Nostrils: Look closely at your reference. Doves have small, often fleshy-looking ceres (the waxy structure at the base of the upper beak) where the nostrils are located. These appear as two tiny bumps or holes at the very base of the beak.
- Mouth Line: A subtle line indicates where the upper and lower mandibles meet.
Keep the beak proportional to the head – it shouldn’t be too large or too long.
Texturing with Feathers
This is where many beginners get stuck, trying to draw every single feather. Don’t! Instead, focus on suggesting the *texture* and *direction* of the feathers.
- Body Feathers: Use short, overlapping, curved strokes to indicate the soft, downy texture of the body feathers. Follow the natural contours of the bird’s body. Think of it as drawing hundreds of tiny overlapping scales, but soft.
- Wing Feathers: On the wings, you’ll see larger, more distinct flight feathers. Draw these as slightly curved, elongated shapes that overlap each other, similar to roof tiles. The primary feathers at the wingtips will be the longest and most defined.
- Tail Feathers: The tail feathers also overlap, fanning out slightly. Draw them with gentle curves, indicating their individual forms.
- Soft Edges: Use your eraser to soften some of the edges of the feather groups, making them appear less harsh and more natural.
Vary the pressure of your pencil strokes to create a sense of depth and realism. Lighter strokes for softer down, slightly firmer for individual flight feathers.
Adding Motion and Grace
Even a perched dove can convey motion. Think about the slight tilt of the head, the curve of the neck, or the subtle shift in weight. For a flying dove, exaggerating the curve of the wings and the spread of the tail can enhance the sense of movement. A slightly open beak can also suggest a coo or call. These small details add personality and life to your drawing.
Finishing Touches: Shading, Light, and Environment
Once your outlines and details are in place, shading is what will transform your flat drawing into a three-dimensional form. This step adds depth, volume, and realism to your dove.
Basic Shading for Depth
Shading is all about understanding where light hits an object and where shadows fall. Imagine a single light source (like the sun or a lamp) illuminating your dove.
- Identify Light Source: Decide where the light is coming from. If it’s from the top-left, then the top-left surfaces of your dove will be brightest.
- Apply Core Shadows: Areas opposite the light source will be in shadow. Use a softer pencil (like a 2B or 4B) or apply more pressure with your HB to create darker tones in these areas. For a dove, shadows will often be under the chin, beneath the wings, on the underside of the body, and within the overlapping feathers.
- Mid-tones: The areas transitioning from light to shadow are mid-tones. Use lighter pressure or a harder pencil for these.
- Highlights: Leave the areas directly hit by the light source as the lightest parts of your drawing (the white of the paper).
- Blend (Optional): You can use a blending stump, a tissue, or even your finger (though be careful of smudges) to smooth out the pencil marks and create softer transitions between shades. However, for a feathery subject, a little texture in the shading can be beneficial.
Remember that dove feathers are generally light-colored, so your shading should be subtle. Focus on the subtle shifts in tone rather than making large, dark areas.
Understanding Light Source
Always keep your imaginary light source consistent throughout your drawing. Inconsistent lighting will make your dove look unnatural. Observe your reference photos carefully for how light interacts with the dove’s form. This practice is crucial for learning how to draw a dove with realism.
Creating a Simple Environment
Your dove doesn’t have to float in a vacuum! A simple background can enhance your drawing. You could add:
- A Branch: If your dove is perched, draw a simple branch or twig for it to sit on. This helps ground the bird and provides a sense of scale.
- Subtle Horizon Line: A faint horizon line or a few wisps of clouds in the background can suggest an open sky for a flying dove.
- Soft Blur: Keep the background soft and out of focus so that the dove remains the main subject. Don’t add too much detail to the background, as it can distract from your beautiful bird.
Even a simple shadow cast by the dove on its perch or the ground can add a lot of realism and depth.
Practice Makes Perfect & Common Pitfalls
Learning how to draw a dove, like any artistic endeavor, is an ongoing journey. The more you practice, the better you’ll become.
The Importance of Regular Practice
Don’t just draw one dove and stop. Try drawing doves in different poses, from different angles, and with varying lighting. Each drawing session is an opportunity to learn and refine your skills. Keep a sketchbook and dedicate a few minutes each day or week to sketching. You’ll be amazed at your progress over time.
Experiment with different pencil pressures, shading techniques, and even different types of paper. The more you explore, the more comfortable and confident you’ll become.
Avoiding Common Mistakes
As you practice, keep an eye out for these common issues:
- Stiff Wings: Often happens when you draw the wings as flat shapes rather than understanding their three-dimensional structure and how they attach to the body. Refer back to your anatomy notes.
- Incorrect Proportions: Head too big, body too small, tail too long – these are common. Always start with your basic shapes and compare their sizes to your reference.
- Flatness: Lack of shading or incorrect shading can make a drawing look two-dimensional. Remember to define light and shadow areas to give your dove volume.
- Too Much Detail Too Soon: Trying to draw every feather or every eye detail before getting the basic structure right can lead to frustration and a messy drawing. Work from general to specific.
- Lack of Flow: Disconnected body parts or sharp, unnatural angles can make a dove look awkward. Aim for smooth, continuous curves.
Don’t be disheartened if you encounter these. They are part of the learning curve! Simply observe what went wrong and adjust in your next drawing.
Experiment and Evolve
Once you’re comfortable with the basic techniques of how to draw a dove, feel free to experiment with your own style. Perhaps you prefer a more impressionistic approach, or maybe you want to delve into hyperrealism. Try different mediums like charcoal, ink, or even digital drawing. The world of art is vast, and your unique perspective is what makes it exciting.
And there you have it! A comprehensive guide to drawing a beautiful dove. From initial sketches to final touches, you’ve learned the steps to bring this graceful bird to life on your paper. Remember, every masterpiece starts with a single line, and every artist starts with a willingness to learn. Keep practicing, keep observing, and most importantly, keep enjoying the wonderful process of creation. Happy drawing!
Frequently Asked Questions
How can I make my dove drawing look more realistic?
To enhance realism, focus on accurate proportions, detailed observation of your reference photos for feather patterns and light interaction, and subtle, gradual shading. Pay special attention to the eyes, as they can convey a lot of life to your drawing. Don’t forget to add soft highlights where light hits the feathers.
What if my wings look stiff or unnatural?
Stiff wings usually happen when you draw them as flat, disconnected shapes. To avoid this, carefully observe how wings attach to the body in your reference images, focusing on the curves and natural flow. Practice drawing the underlying bone structure of a bird’s wing (even if simplified) to understand its movement before adding feathers.
Are there different styles for drawing doves?
Yes, certainly! Beyond realism, you could explore cartoon styles, stylized interpretations, minimalist line art, or even more expressive, painterly approaches. Once you master the basics of how to draw a dove realistically, you can adapt the techniques to any style you prefer. Experimentation is encouraged!
How can I make my dove appear to be flying?
To convey flight, focus on dynamic wing positions – outstretched, beating, or gliding. Emphasize the spread of the primary flight feathers at the wingtips and the slight tilt or twist of the body. You can also add subtle motion lines or a simple background element like a cloud to enhance the sense of movement.
What are some common mistakes to avoid when drawing a dove?
Common pitfalls include incorrect proportions (e.g., too large a head or too small a body), stiff or poorly attached wings, lacking depth due to insufficient shading, and trying to draw intricate details before establishing the basic form. Always start with light construction lines and build up gradually.
How important are reference images for drawing a dove?
Reference images are incredibly important, especially when you’re learning how to draw a dove. They provide accurate information about anatomy, proportions, feather patterns, and how light interacts with the bird’s form. Even experienced artists use references; they are a vital tool for achieving accuracy and realism in your artwork.